How to Insulate and Winterise Your Pet Door: Keep Your Home Warm and Your Pet Happy
Posted January 23, 2025
As temperatures drop, your beloved pet door can become a significant source of heat loss, causing cold air drafts and increased heating bills.
This guide will show you how to effectively winterise and insulate your pet door, keeping your home energy-efficient and comfortable while ensuring your pet enjoys the same convenience.
Whether you’re a seasoned DIY enthusiast or a first-time pet owner, you’ll find tips and tricks to upgrade your pet door for cold weather with ease.
Table of Content:
1. Why Winterizing Your Pet Door Matters 2. How Pet Doors Can Cause Drafts and Heat Loss 3. Types of Pet Doors for Cold Weather 4. DIY Steps to Insulate a Pet Door 5. Upgrade Options for Energy-Efficient Pet Doors 6. How to Seal Gaps Around Your Pet Door 7. Replacing Flaps for Better Insulation 8. Using Magnets for a Tighter Seal
Why Winterising Your Pet Door Matters?
Winterising your pet door isn’t just about keeping your home warm; it’s about reducing heat loss, cutting down on heating costs, and ensuring your pet’s comfort during extreme weather.
Many pet owners overlook this small yet critical aspect of winter home preparation. But not you!
A poorly insulated door leaves your home vulnerable to cold air infiltration and can lead to higher energy bills.
By taking simple steps, you can maintain a warm indoor climate without sacrificing your pet’s convenience.
How Pet Doors Can Cause Drafts and Heat Loss
Pet doors, while convenient, often create gaps that let cold air and wind enter your home.
Over time, even high-quality doors can develop cracks or lose their airtight seal, increasing heat loss.
The main culprits are worn-out door flaps and inadequate weatherstripping.
Ensuring the flap is intact and upgrading the seal can significantly improve the door’s insulation, helping to save on heating costs during the winter months.
Types of Pet Doors for Cold Weather
Not all Pet doors are created equal. Some models are specifically designed for better insulation and wind resistance:
Double-flap pet doors: These provide an extra layer of protection against heat loss.
Electronic doors: Automatically open and close to minimise exposure to cold air.
Weatherproof doors: Built to withstand extreme weather conditions while keeping drafts out.
When choosing a cat/dog door, consider one with high-quality materials and a tight frame to maintain energy efficiency.
Easy DIY Steps to Insulate and Weatherproof Your Pet Door
If you’re on a budget, DIY insulation is an effective way to winterize your Pet door and improve energy efficiency.
Don’t worry if you’re new to home improvement—this guide breaks down each step in detail, making it foolproof even for beginners. Let’s dive in.
1. Inspect the frame and the door
Before you start any insulation project, it’s essential to identify the problem areas. Follow these steps to thoroughly inspect your pet door:
Gather Your Tools: You’ll need a flashlight, a screwdriver, and a piece of thin paper (like a receipt or tissue paper).
Check for Gaps: Run the paper along the edges of the pet door frame while holding it lightly. If it flutters, you’ve found a draft.
Inspect the Flap: Check if the flap is worn, cracked, or bent. A damaged flap won’t seal properly, letting cold air in.
Tighten Screws: Loose screws can create gaps between the frame and the door. Use a screwdriver to secure them.
Look for Structural Issues: Ensure the frame is flush against the door or wall. Warping can create hidden gaps that need attention.
2. Apply Weatherstripping
Weatherstripping is one of the simplest and most effective ways to create an airtight seal around your Pet door. Here’s how to do it:
Choose the Right Weatherstripping: Opt for foam or rubber adhesive weatherstripping, which is easy to apply and available at most hardware stores.
Clean the Surface: Wipe down the frame and surrounding area with a damp cloth to remove dust and grease. Allow it to dry completely to ensure the adhesive sticks well.
Measure and Cut: Use a measuring tape to determine the length of weatherstripping needed. Cut it to size with scissors or a utility knife.
Apply the Strips: Peel off the adhesive backing and press the weatherstripping firmly along the edges of the pet door frame. Make sure it forms a tight seal without obstructing the flap’s movement.
Test the Seal: Close the flap and check for any remaining drafts using the tissue paper method from Step 1. Adjust as needed.
Note: If you’re looking for expert pet door installation, Sharp Glass offers free consultations to help you choose the best solution for your home and pet.
3. Add Insulation
Adding insulation can significantly reduce heat loss and prevent cold air from entering your home. Here’s how to tackle this step:
Select Your Insulating Material: You can use foam board, spray foam, or reflective insulation tape, all of which are readily available at hardware stores.
Measure the Area: Measure the dimensions of the pet door frame and surrounding wall or door panel.
Cut the Insulation: If you’re using foam board, cut it to size using a utility knife. For spray foam or tape, you’ll apply it directly.
Attach the Insulation:For foam board, secure it to the interior side of the door or wall with strong adhesive or mounting tape.
For spray foam, carefully apply it around the edges of the frame to fill in any gaps. Be sure not to overapply, as it expands when it dries.
For reflective tape, cover the back of the frame to add an extra barrier against heat loss.
Smooth and Trim: Once everything is in place, smooth out any bumps and trim excess material for a clean finish.
Test It: Open and close the flap to ensure the insulation doesn’t interfere with your pet’s access.
Additional Tips for Beginners
Use Temporary Solutions If Needed: If you’re not ready to commit to permanent fixes, you can temporarily block drafts with rolled-up towels or blankets around the frame on cold days.
Watch Tutorials: Many hardware stores and online platforms offer step-by-step video guides for applying weatherstripping and insulation. These can be helpful if you’re a visual learner.
Work Slowly: Take your time with each step, especially when applying adhesive or cutting materials. Rushing can lead to mistakes.
Have a Handyman on Call: If you encounter any challenges, don’t hesitate to ask a handyman (Or contact Sharp Glass) or a friend with DIY experience for assistance.
Upgrade Options for Energy-Efficient Pet Doors
While DIY solutions are a fantastic way to improve your pet door’s insulation on a budget, there comes a time when upgrading to a more energy-efficient pet door is the smarter, long-term choice.
Upgrades are particularly beneficial for households in New Zealand, where maintaining a comfortable indoor climate during colder months is a priority.
Let’s explore why an upgrade might be right for you and the best options available.
When You Should Consider Upgrading Your Pet Door
DIY solutions can work wonders for insulating your pet door, but they aren’t always a permanent fix.
If you notice these issues, it might be time to upgrade to a more energy-efficient option:
Persistent Drafts: Despite adding insulation or weatherstripping, cold air still seeps through.
Worn-Out Flap: The flap no longer seals tightly, is cracked, or has become misaligned.
High Heating Costs: Your energy bill remains higher than expected, even after sealing gaps.
Durability Issues: The door’s frame or materials are showing signs of wear, compromising insulation.
Upgrading your pet door ensures better insulation, long-term savings, and increased comfort for both your home and your furry friends.
Energy-Efficient Pet Door Options in NZ
Here are some top-rated options available in New Zealand:
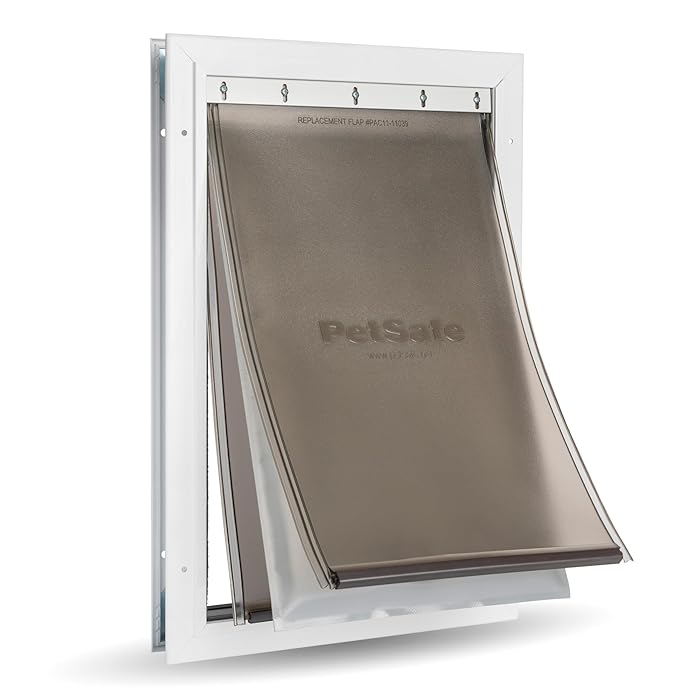
PetSafe Extreme Weather Pet Door
Pros:
Triple-flap system for superior insulation.
Durable aluminium frame.
Easy DIY installation.
Ideal for extreme climates.
SureFlap Microchip Pet Door
Pros:
Uses your pet’s microchip for secure access.
Prevents unwanted critters from entering.
Energy-efficient with a tight seal.
Battery-operated, no wiring needed.
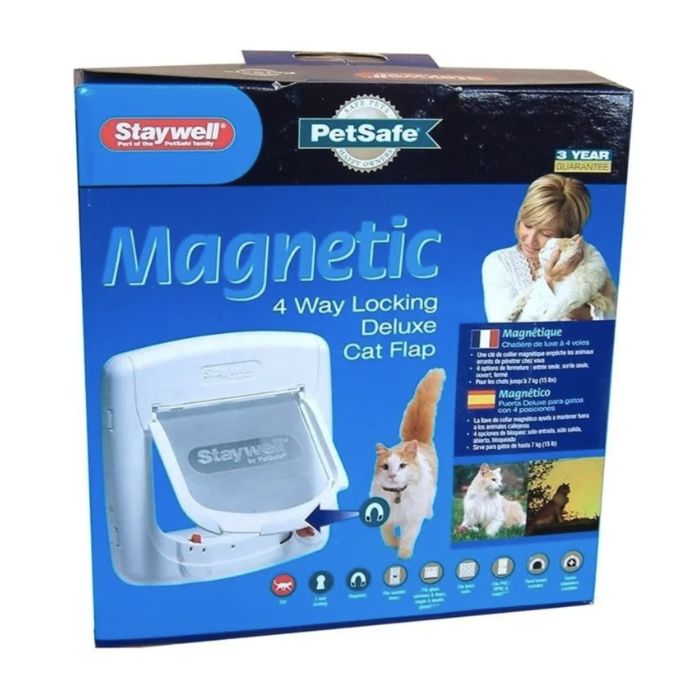
Staywell Pet Door Automagnetic
Pros:
Magnetic flap reduces drafts.
Four-way locking mechanism for security.
Suitable for various pet sizes.
Durable and weather-resistant.
Final Thoughts
Upgrading to an energy-efficient pet door can enhance your home’s comfort and contribute to long-term savings on energy bills.
If DIY solutions aren’t enough to solve persistent drafts or rising energy costs, investing in a high-quality pet door designed for New Zealand’s climate is a worthwhile step.
Whether it’s improving your existing setup or recommending a new pet door, their expert advice can save you time, money, and hassle. Get in touch with them today to find the perfect option for your needs.
With our professional guidance, you’ll enjoy a warm, energy-efficient home and a happy pet!
Not sure whether to DIY or upgrade? Sharp Glass offers free consultations to help you decide the best solution for your home and pet.